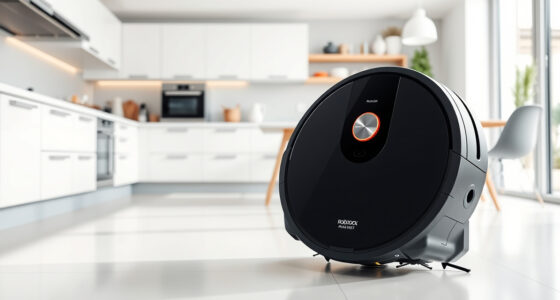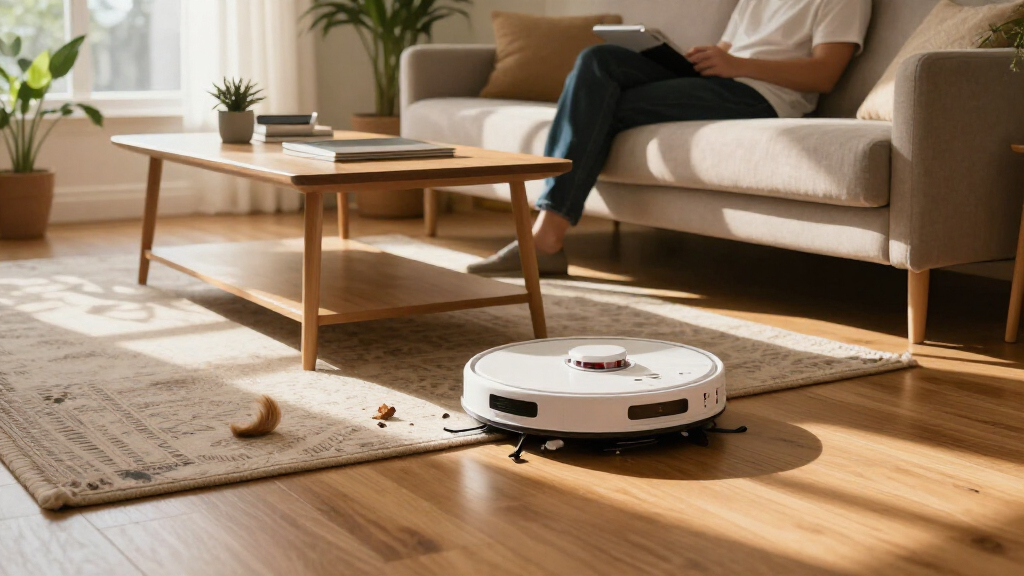

Set up your robotic vacuum, connect it to its app if available, and prepare it to clean your floors safely. This guide is for first-time owners and assumes you can use basic household tools and a smartphone. Allow 45-90 minutes for initial setup and mapping; routine cleaning usually needs 5-15 minutes of preparation.

Get cleaning gear delivered free with Prime
- Fast, free delivery on millions of items
- Prime Video, Amazon Music and more included
- Member-only deals all year

Roborock Qrevo S Pro Robot Vacuum and Mop
- ✔ Suction: 18,500 Pa
- ✔ Dust bag capacity: 2.7 L
- ✔ Listed battery life: 180 minutes

Shark AV2501AE AI Robot Vacuum with XL HEPA Self-Empty Base
- ✔ Navigation: 360° LiDAR
- ✔ Cleaning navigation: Matrix Clean
- ✔ Base: Bagless, self-emptying

ROPVACNIC S1 Robot Vacuum and Mop Combo, 5200 Pa
- ✔ Suction power: 5,200 Pa
- ✔ Listed battery life: 120 minutes
- ✔ Water adjustment: Four stages
Difficulty: Beginner | Time: 45-90 minutes for setup; 5-15 minutes for routine preparation
What You’ll Need
Tools & Materials:
- Robotic vacuum and charging dock
- Power outlet near a clear, level docking spot
- Smartphone and the manufacturer’s app, if your model uses one
- Wi-Fi network details, if app setup requires Wi-Fi
- Scissors or a small tool for removing packaging and hair from brushes
Knowledge:
- Basic smartphone app use
- How to identify fragile objects, loose cords, and small items on the floor
Check the manual for your model’s charging, Wi-Fi, floor, and maintenance requirements. Keep the vacuum and dock away from water and damp areas. If the vacuum has a mop attachment, check which floor types and cleaning solutions the manufacturer permits.
Roborock Qrevo S Pro Robot Vacuum and Mop
The Roborock Qrevo S Pro earns our top spot by combining broad floor coverage with a dock that takes on several recurring chores. It lists 18,500 Pa suction, LiDAR navigation, obstacle avoidance, and app-based room and multi-floor controls. Its dual spinning mops lift by 10 mm for carpet transitions, while adjustable carpet settings give it more mixed-floor flexibility than the ROPVACNIC S1, which is specified for low-pile carpets.The dock is the bigger day-to-day distinction: it empties dust into a bag, washes the mops with 167°F water, and dries them with 113°F warm air. That makes this a stronger choice for people who want regular mopping without washing pads after every run. The Shark AV2501AE has a self-emptying base and specified HEPA filtration, but it is a vacuum-only model; choose it instead if allergen filtration and bagless dust handling outrank mopping.There are practical caveats. The Roborock supports 2.4 GHz Wi-Fi only, which may not suit every network setup, and its listed noise level varies between 55 dB and 60 dB in the supplied details. Its dock also adds another component to accommodate. We see it as the strongest all-rounder for homes with both hard floors and carpets, provided its connectivity and dock footprint work for us.
Pros:
- Dock empties the dust bag, washes mops with hot water, and dries them with warm air.
- Liftable spinning mops and carpet adjustments support mixed-floor cleaning.
- LiDAR mapping includes multi-floor and room-specific app controls.
- Anti-tangle brush system is designed to reduce hair wrap.
Cons:
- Wi-Fi support is limited to 2.4 GHz.
- The listed noise figures conflict: 55 dB in one place and 60 dB elsewhere.
- The dock requires room for its dust bag and mop-care functions.
Best for: Households with mixed hard floors and carpets that want scheduled vacuuming and mopping with less hands-on mop maintenance.
Not ideal for: Buyers who need 5 GHz Wi-Fi support, want a compact setup, or only need a vacuum with specified HEPA filtration.
Bottom line: We recommend the Qrevo S Pro as the most capable all-round option here for buyers who want both vacuuming and mopping with substantial dock automation.
“We recommend the Qrevo S Pro as the most capable all-round option here for buyers who want both vacuuming and mopping with substantial dock automation.”
Shark AV2501AE AI Robot Vacuum with XL HEPA Self-Empty Base
For buyers who want a robot vacuum rather than a mop combo, the Shark AV2501AE has a clear purpose. Its 360° LiDAR mapping and Matrix Clean navigation are designed to provide systematic coverage, while object detection helps it navigate around obstacles. The base is bagless and self-emptying, with capacity listed for up to 60 days of debris, so routine dustbin handling is less central than it is with a basic robot.Its strongest differentiator from the Roborock Qrevo S Pro is filtration: Shark specifies a HEPA filter capturing 99.97% of dust and allergens down to 0.3 microns. The Qrevo can vacuum and mop and offers a more capable wash-and-dry dock, but its supplied specs list a washable filter rather than HEPA performance. The Shark also supports Recharge and Resume, useful when a cleaning run needs more time than one charge allows.That focus comes with a firm limit: there is no mopping function, so hard floors that need wet cleaning require another tool. The product information specifies one power level and a 5.67-inch cleaning path width, giving us less stated adjustment detail than the Roborock. We’d place the Shark ahead of the ROPVACNIC when filtration and mapped vacuuming are the priorities, but behind the Qrevo for a household that expects one robot to handle both floor care tasks.
Pros:
- HEPA filtration is specified to capture 99.97% of dust and allergens down to 0.3 microns.
- Bagless self-emptying base is listed for up to 60 days of debris capacity.
- 360° LiDAR and Matrix Clean navigation support mapped, systematic coverage.
- Recharge and Resume can continue a cleaning job after recharging.
Cons:
- Does not provide mopping.
- The supplied product information specifies one power level.
- Listed cleaning path width is 5.67 inches.
Best for: People who want mapped vacuuming across carpets and hard floors, a bagless self-emptying base, and specified HEPA filtration.
Not ideal for: Buyers who want a robot to mop, need multiple stated suction levels, or prioritize detailed carpet and mop adjustments.
Bottom line: We’d choose the AV2501AE when mapped vacuuming, bagless emptying, and stated HEPA filtration matter more than an integrated mop.
“We’d choose the AV2501AE when mapped vacuuming, bagless emptying, and stated HEPA filtration matter more than an integrated mop.”
ROPVACNIC S1 Robot Vacuum and Mop Combo, 5200 Pa
The ROPVACNIC S1 is the straightforward combo in this lineup. It vacuums and mops, offers four-stage water adjustment and three suction levels, and can be controlled by app, remote, touchpad, or voice. That flexibility gives us several ways to start or adjust a routine without relying on one control method. Compared with the Shark AV2501AE, it can wet-clean hard floors; compared with the Roborock Qrevo S Pro, it asks us to take on more mop care because the supplied description does not list a dock that washes and dries the pads.Its brush-free design and dual rotating side brushes are intended to collect pet hair while reducing tangles. The robot also detects obstacles and returns to its dock automatically. Listed suction is 5,200 Pa, and runtime is 120 minutes. Those details make it a reasonable fit for simpler cleaning routines, especially where hard floors and low-pile carpet dominate.The key limitation is carpet reach: the supplied surface compatibility specifies hardwood and low-pile carpets, so we would not treat it as a strong choice for homes with substantial or plush carpeting. Its navigation description also provides less detail than the LiDAR mapping listed for the Roborock and Shark. Choose this model when mopping and flexible controls are useful, but skip it if you need deeper carpet coverage or more automated mop maintenance.
Pros:
- Combines vacuuming and mopping with four-stage water adjustment.
- Three suction levels provide some cleaning adjustment.
- App, remote, touchpad, and voice controls offer several ways to operate it.
- Brush-free design and dual side brushes are intended to reduce pet-hair tangles.
Cons:
- Specified carpet suitability is limited to low-pile surfaces.
- Listed battery life is 120 minutes.
- The supplied description does not list automated mop washing or drying.
Best for: Buyers seeking a basic vacuum-and-mop robot for mostly hard floors, with multiple control methods and adjustable water flow.
Not ideal for: Homes with medium- or high-pile carpets, or buyers who want a dock to wash and dry mop pads automatically.
Bottom line: We recommend the S1 for uncomplicated hard-floor and low-pile cleaning when a basic integrated mop and flexible controls are more important than advanced dock care.
“We recommend the S1 for uncomplicated hard-floor and low-pile cleaning when a basic integrated mop and flexible controls are more important than advanced dock care.”
As an Amazon Associate we earn from qualifying purchases.
Before You Start
Remove all packaging from the vacuum, dock, and accessories. Keep the manual nearby because button locations, indicator lights, and app steps vary. A robot vacuum can pull in cords, socks, small toys, and loose fringe, so check the floor before every run. Keep children and pets away during the first cleaning until you know how the robot moves around them.
Step-by-Step Instructions
Step 1: Choose a docking location
Place the dock on a level, hard surface against a wall, near an outlet. Leave the clearance specified in the manual around the dock; if the manual gives no distance, keep the space in front and on each side open. Avoid stairs, narrow passages, direct water exposure, and spots where furniture blocks the robot’s approach.
Tip:Choose a location that stays clear between cleaning runs. Moving the dock after the robot maps your home can make it harder for some models to find its way back.
Check: The dock sits flat, has power, and the robot can approach it from the front without hitting furniture.
Step 2: Charge the vacuum
Connect the dock to power, then place the vacuum on its charging contacts or press its return-to-dock button. Check the manual or app to confirm it has started charging. Leave it charging for the time the manufacturer recommends before the first full cleaning run.
Tip:Align the charging contacts carefully. A vacuum may appear parked at the dock while failing to charge if the contacts do not meet.
Check: The vacuum or app shows a charging status or a full battery indicator.
Step 3: Install the app and connect the vacuum
If your model supports an app, install the manufacturer’s official app and follow its setup prompts. Turn on the vacuum, choose the correct model, and connect it to your home Wi-Fi if requested. Grant only the phone permissions needed for setup and features you plan to use.
Tip:Some models only connect to a 2.4 GHz Wi-Fi network. Check the manual if pairing fails, and keep your phone close to the vacuum during setup.
Check: The app displays the vacuum as connected and can show its battery or let you start a cleaning run.
Step 4: Prepare the floor
Walk through the rooms you want cleaned and pick up cords, clothing, toys, paper, and other small objects. Secure loose cables, tuck in rug fringe, and remove lightweight items the vacuum could push around. Open doors to rooms you want included, and close doors or use the model’s boundary features to exclude areas.
Tip:Check the height and stability of rugs and floor mats. If a rug bunches, slips, or has long fringe, remove it or block it off for the first run.
Check: The planned route has clear floor space, stable rugs, and no loose items the robot could swallow or drag.
Step 5: Start a supervised first run
Place the vacuum in the area described by the manual, then start a cleaning run from its button or app. Follow it through the first rooms and watch how it handles furniture, rugs, thresholds, and cords. Stop the vacuum if it gets tangled, pushes an item into a hazard, or repeatedly struggles with an obstacle.
Tip:Let the robot complete a mapping run if your model offers one. Keep the dock in its chosen location while it maps, and do not carry the robot between rooms unless the manual instructs you to.
Check: The vacuum moves through the intended area without getting trapped and can return to its dock or report that cleaning is complete.
Step 6: Review the map and set boundaries
If the app provides a home map, inspect it after mapping. Rename rooms or divide the map only if the app supports those edits. Add no-go zones around places the vacuum should avoid, such as pet bowls, delicate objects, or cable clusters. Confirm the map reflects the rooms you want to clean before creating a schedule.
Tip:Map editing varies by model. If a room is missing, clear the route and run mapping again according to the app instructions instead of relying on an inaccurate boundary.
Check: The app shows the intended rooms and any restricted areas, or the vacuum’s manual boundary method blocks the places you marked.
Step 7: Choose cleaning settings and a schedule
Set the suction level and cleaning mode for your floors using the app or onboard controls. Start with the manufacturer’s recommended setting, then select the rooms and days you want cleaned. Schedule runs for times when floors are usually clear and household members or pets are least likely to be disturbed.
Tip:Higher suction can use more battery and may be louder. If the vacuum cannot finish the planned area, schedule smaller room groups or use a lower-power setting if your model supports it.
Check: The schedule lists the selected days, times, and rooms, and the vacuum has enough battery to begin a run.
Step 8: Empty and inspect after cleaning
When the vacuum returns to the dock, remove and empty its dustbin as the manual describes. Check the filter, brush roll, side brushes, wheels, and sensors for dust, hair, or debris. Remove tangled hair with the supplied tool, and reinstall each part securely. Clean or replace filters only as the manufacturer directs.
Tip:Turn off the vacuum before clearing a jam. Avoid washing parts unless the manual says they are washable, and let washable parts dry fully before reinstalling them.
Check: The bin is empty, the brushes and wheels turn freely, and the vacuum reports no maintenance warning.
Common Mistakes to Avoid
- Placing the dock in a cramped spot or moving it after mapping. — Use a level location with the clearance in the manual, and keep it there so the vacuum can return reliably.
- Starting the first run with cords, socks, or small objects on the floor. — Walk the route before each run and secure or remove items that could tangle the brushes or block the vacuum.
- Scheduling cleaning before checking the map and restricted areas. — Review the map after a supervised run, then add boundaries and confirm the chosen rooms.
- Letting hair and dust build up in the bin, filter, or brushes. — Inspect these parts after early runs to learn how quickly they collect debris, then follow the manual’s cleaning and replacement intervals.
Troubleshooting
Problem: The vacuum does not charge at the dock.
Solution:
Check that the dock is plugged into a working outlet and sits on a level surface. Reposition the vacuum so its contacts meet the dock contacts, then check for a charging indicator. Clean the contacts only as directed by the manual. If it still will not charge, consult the manufacturer’s troubleshooting instructions for the battery and dock.
Problem: The vacuum will not connect to the app or Wi-Fi.
Solution:
Confirm the phone is on the home network and that the network meets the vacuum’s Wi-Fi requirements. Move the phone and vacuum closer to the router during pairing, restart the app, and repeat the manufacturer’s setup sequence. Check whether the model requires 2.4 GHz Wi-Fi or a specific app permission.
Problem: The vacuum gets stuck or stops during a run.
Solution:
Turn it off and remove the object caught in its wheels or brushes. Clear cords, loose rug fringe, and low obstacles from the route, then adjust the map or boundary settings if the same location causes trouble. Restart the run from a clear area.
Problem: The vacuum misses rooms or cannot return to its dock.
Solution:
Clear the route between the room and dock, open the relevant doors, and check that the dock has not moved. Review the map for missing areas or inaccurate boundaries. If mapping is incorrect, follow the app instructions to remap with the dock in its usual location.
What Success Looks Like
Your vacuum is charged, its dock is accessible, and it completes a supervised run over the intended floors without tangling or becoming trapped. The app or controls show the selected rooms and schedule, where available, and the vacuum returns to the dock. After the run, the dustbin is emptied and the brushes, wheels, and filter are free of debris that could affect the next cleaning.
Next Steps
After a few runs, adjust the schedule to match how quickly your floors collect dust and debris. Empty the bin and inspect the brushes regularly, using the intervals and replacement guidance in your manual. Recheck cables, rugs, and no-go zones whenever you move furniture or change the cleaning area. Contact the manufacturer if charging, navigation, or error warnings continue after the steps in its troubleshooting guide.
Frequently Asked Questions
How often should I run a robotic vacuum?
Set a frequency that suits your floors, household traffic, and pets. Start with a few runs per week, then adjust if dust and debris build up between runs or the bin fills too quickly.
Does a robotic vacuum need Wi-Fi?
Many models can start cleaning with onboard buttons, but app features such as scheduling, maps, and remote control may need Wi-Fi. Check your model’s manual for the features available offline.
Can I use a robotic vacuum on rugs and hard floors?
Many models support both, but rug height, fringe, and floor type can affect performance. Check the model’s floor compatibility and supervise the first run over each rug or threshold.
Can I leave the vacuum on its dock?
Most models are designed to remain on their powered dock between runs. Follow the manual’s storage and battery guidance, especially if you will be away for an extended period.