If your robot vacuum shows error codes or stops unexpectedly, start by inspecting and gently cleaning the sensors with a soft, dry cloth or cotton swab to remove dust or debris. Check that the charging dock is clear, properly connected, and unobstructed. Make sure the robot’s sensors and charging contacts are clean and correctly aligned. If issues persist, resetting the device or dock can help. Keep exploring for more detailed tips to troubleshoot efficiently.
Key Takeaways
- Refer to the user manual or app for specific error code meanings and recommended actions.
- Inspect and clean sensors with a soft, dry cloth to resolve obstacle detection issues.
- Ensure charging contacts are clean and the dock is properly positioned to fix charging errors.
- Restart or reset the robot vacuum to clear temporary glitches causing error codes.
- Check for obstructions, dirt, or misalignments that may interfere with sensor or charging station performance.

Robot vacuum errors can be frustrating, but many issues are easy to troubleshoot with some simple steps. When your robot suddenly stops or displays an error code, it’s often related to something as straightforward as the robot vacuum sensors or charging dock issues. These components are vital for smooth operation, so understanding how to address problems with them can save you time and prevent unnecessary repairs.
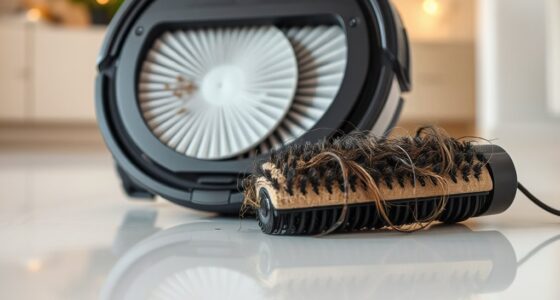
If your robot vacuum isn’t moving or seems to be stuck, the first thing you should check are the robot vacuum sensors. These sensors help your device navigate around obstacles and avoid falls. Sometimes, they get dirty or covered with dust, hair, or debris, which can cause your vacuum to misjudge its surroundings and stop functioning correctly. To troubleshoot, turn off your robot and gently clean the sensors with a soft, dry cloth or a cotton swab. Avoid using liquids, as they can damage the sensors. Once cleaned, turn the vacuum back on and observe if it resumes normal operation. If the sensors are clear but errors persist, check whether the sensors are properly aligned or if anything is obstructing them, such as a piece of tape or a sticker.
Check and clean your robot vacuum sensors to fix movement and obstacle issues.
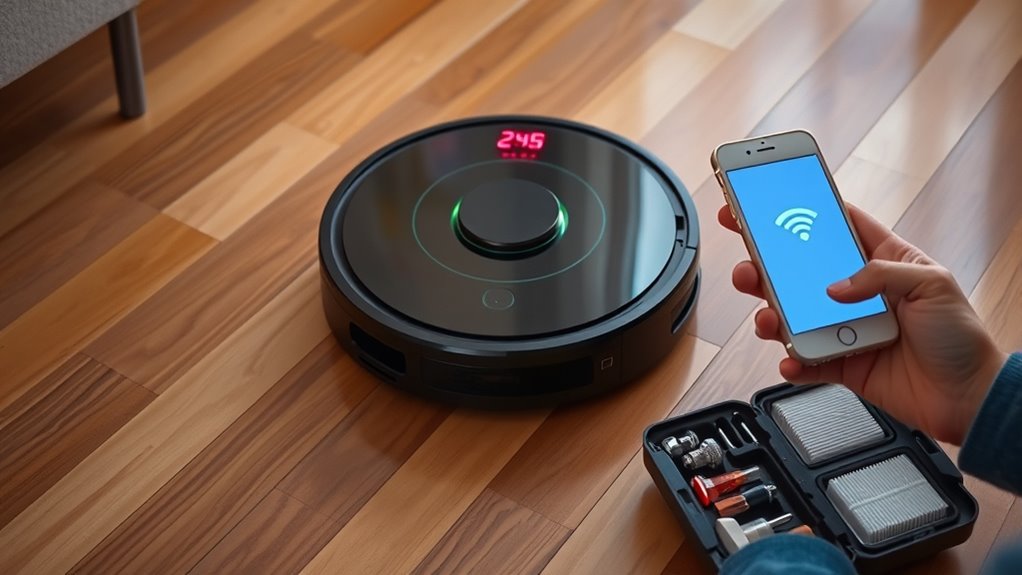
Charging dock issues are another common cause of robot vacuum errors. If your device refuses to dock or charges intermittently, it’s vital to inspect the charging station. Make sure the dock is plugged in correctly and that the power outlet is functioning. Clear any dust or debris from the charging contacts on both the dock and the robot. Sometimes, dirt or corrosion can interfere with charging, leading to error messages or the vacuum not returning to its station. If your robot still isn’t charging despite these efforts, try repositioning the dock to a more open area with minimal obstacles. Ensure the dock is on a flat, stable surface and that nothing is blocking the robot’s path to it. You might also want to reset the robot or restart the charging station to see if that resolves the error. Some models have specific reset procedures, so consulting your user manual can be helpful.
In many cases, these simple troubleshooting steps address the core issues with robot vacuum errors. Regular maintenance, like cleaning sensors and ensuring the charging dock is accessible and clean, can prevent future problems. Remember, understanding the role of sensors and the importance of a good charging setup helps keep your robot vacuum running smoothly, saving you time and frustration down the line.

Thames & Kosmos Dusty Robot Vacuum Cleaner STEM Kit | Build a Desktop Robotic Vacuum with Sensors, Explore Robotics, Engineering & Mechanical Devices, Fun Gift for Ages 8+ or Adults
CONSTRUCTION PROJECT MAKES CLEANING FUN! Assemble this robotic desktop vacuum cleaner that actually works to pick up dust,…
As an affiliate, we earn on qualifying purchases.
As an affiliate, we earn on qualifying purchases.
Frequently Asked Questions
Can Error Codes Be Reset Manually?
Yes, you can manually reset error codes on your robot vacuum. First, interpret the error code by checking the user manual or app, then follow the reset procedures, which often involve turning the device off, unplugging it, or pressing specific buttons. This process clears the error and restores normal operation. Always make sure you understand the error code interpretation before attempting a reset to avoid further issues.
How Often Should I Update My Robot Vacuum’s Firmware?
You should check for firmware updates regularly to keep your robot vacuum running smoothly. Firmware updates often include software patches that fix bugs, improve performance, and add new features. Many models automatically notify you when updates are available, but it’s a good habit to manually verify once a month. Keeping your firmware current ensures your vacuum operates efficiently and securely, preventing potential issues before they arise.
Are There Safety Precautions When Troubleshooting Error Codes?
When troubleshooting error codes, don’t forget safety gear like gloves and goggles—because who doesn’t want to look stylish while avoiding potential hazards? Before diving in, always disconnect the power—trust me, shocking moments are best left to horror movies. Careful handling prevents damage to your device and keeps you safe from unexpected surprises. Remember, safety isn’t just a suggestion; it’s your first step toward successful troubleshooting and a happy, clean home.
Do Error Codes Indicate Permanent Damage or Just Temporary Issues?
When you see an error code, it’s usually a sign of a temporary issue rather than permanent damage. Error code clarification helps you understand whether it’s a minor problem or something more serious. Often, a simple reset or cleaning can resolve the issue. However, if the error persists, it’s wise to perform a damage assessment. Most error codes indicate temporary glitches, but don’t ignore warning signs that could signal potential damage.
What Should I Do if Error Codes Persist After Troubleshooting?
Did you know that over 60% of persistent error codes are due to software glitches? If error codes keep showing up after troubleshooting, don’t panic. You should check for software updates and perform hardware inspections, like cleaning sensors or checking connections. If issues persist, contact the manufacturer or a professional technician. Regular maintenance and updates can prevent future errors, ensuring your robot vacuum works smoothly.
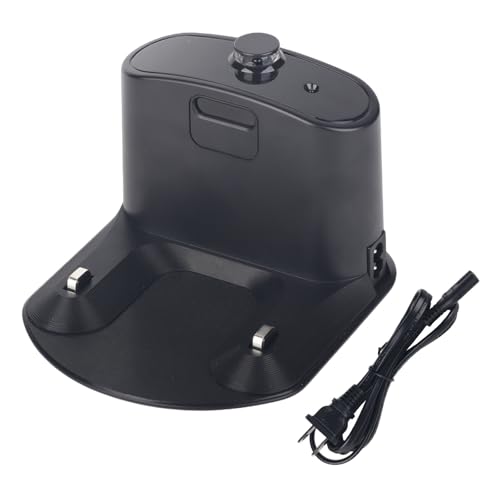
for Roomba Charger Dock,Replacement for iRobot Roomba Charging Base e5 e6 i1 i3 i4 i5 i6 i7 i8 500-900 Series Models Vacuum Cleaners-with US- Power Cord ADF-N1 17070 17064 4452369(1pcs+1cable)
Compatible Models: iRobot Roomba E5, E6, I1, I3, I4, I6, I7, I8 Series Vacuum Cleaners
As an affiliate, we earn on qualifying purchases.
As an affiliate, we earn on qualifying purchases.
Conclusion
By understanding and addressing common error codes, you can keep your robot vacuum running smoothly. Remember, a stitch in time saves nine—tackle issues early before they become bigger problems. Regular maintenance and quick troubleshooting guarantee your device stays in top shape, saving you time and frustration. So, stay vigilant and proactive; your robot vacuum will thank you by cleaning efficiently and lasting longer, proving that a little care goes a long way.

ROPVACNIC Robot Vacuum Cleaner Robot Vacuum and Mop Combo with 5200Pa Suction, Personalized Cleaning Adjustments, Self-Charging Robotic Vacuum Cleaner, Advanced Obstacle Avoidance
【2-in-1 Mopping and Vacuuming】 The ROPVACNIC Robot S1 integrates advanced electronically controlled mopping technology, significantly enhancing both cleaning…
As an affiliate, we earn on qualifying purchases.
As an affiliate, we earn on qualifying purchases.

NUHFUFA LDS Lidar Motor for Robo-Rock S5/S5 MAX /S6/S6 MAX/Mi 1, Robot Vacuum Cleaner Distance Sensor with Orange Pulley and Screwdriver Replacement Parts
Compatible with Robo-rock S5/S5 MAX /S6/S6 MAX/Mi 1. Exquisite and delicate, highly matched with the original equipment.
As an affiliate, we earn on qualifying purchases.
As an affiliate, we earn on qualifying purchases.