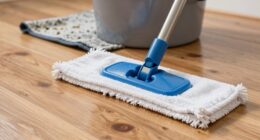
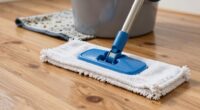
To make your robot vacuum clean faster in just five minutes, start by ensuring its map is clear and accurate. Remove obstacles like cords and clutter, and update virtual boundaries to guide it away from tricky spots. Adjust your floor plan if needed to promote smooth navigation, and run a quick test to identify missed areas. Keeping your map current and properly set up helps maintain top speed and efficiency—keep going to learn more tips.
Key Takeaways
- Regularly run mapping updates after furniture changes to ensure accurate navigation and coverage.
- Clear clutter and obstacles near docking stations and high-traffic areas to improve obstacle detection.
- Use app tools to review and refine virtual boundaries, preventing missed spots or unnecessary reruns.
- Re-map periodically to adapt to seasonal or layout modifications for optimal cleaning speed.
- Maintain sensors and update firmware to ensure precise mapping and faster, more efficient cleaning cycles.
Why a Clear Map Layout Makes Your Robot Vacuum Faster
A clear map layout helps your robot vacuum navigate more efficiently by reducing confusion and unnecessary overlaps. When your floor plan design is straightforward, the vacuum spends less time figuring out where to go, which speeds up cleaning. Proper robot vacuum maintenance, like keeping sensors clean and updating maps regularly, guarantees your device reads the layout accurately. A well-designed floor plan minimizes obstacles and tight spaces that can slow down the robot. When the map is easy to interpret, the vacuum can follow a logical cleaning path, completing tasks faster. This effective map design not only improves efficiency but also prolongs the life of your device. Additionally, understanding the contrast ratio of your home theater projector can inspire strategic planning for designing optimal floor layouts. Optimizing the floor plan design can further enhance your robot’s performance and reduce cleaning time. Implementing a consistent mapping strategy ensures the robot maintains accurate navigation over time, preventing misreads and delays. Overall, a clear map layout makes your robot vacuum work smarter, not harder, saving you time and hassle.
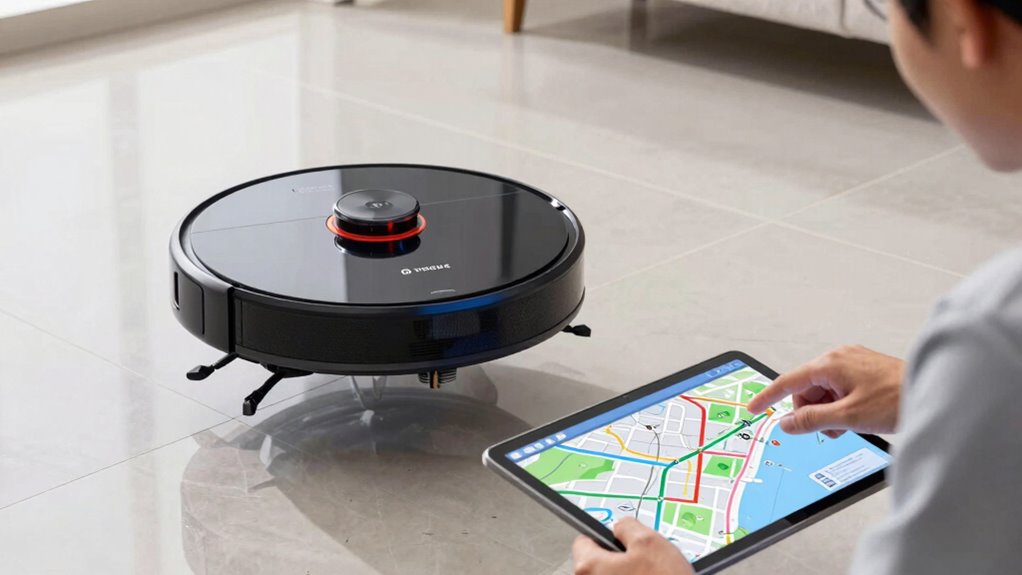
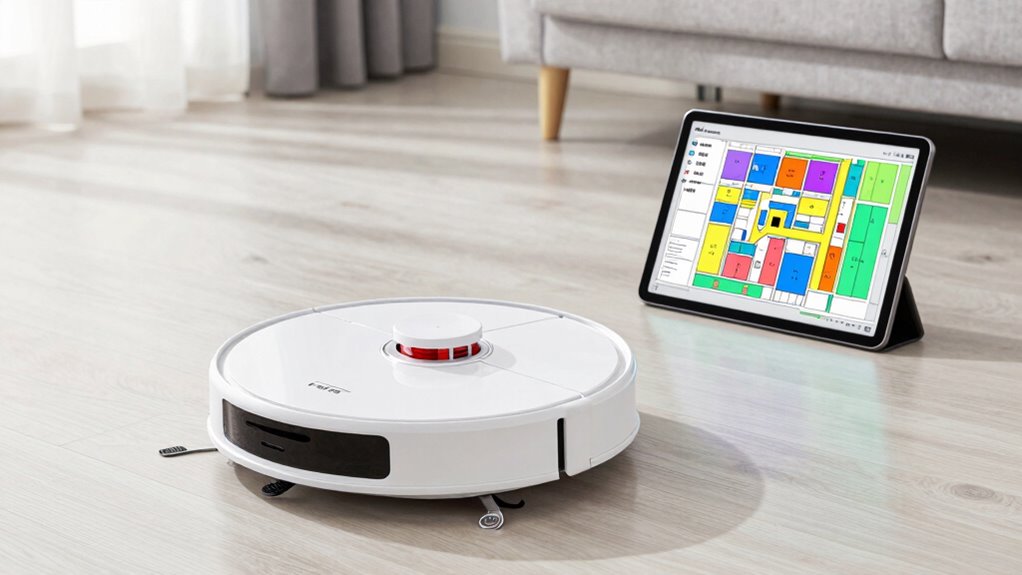
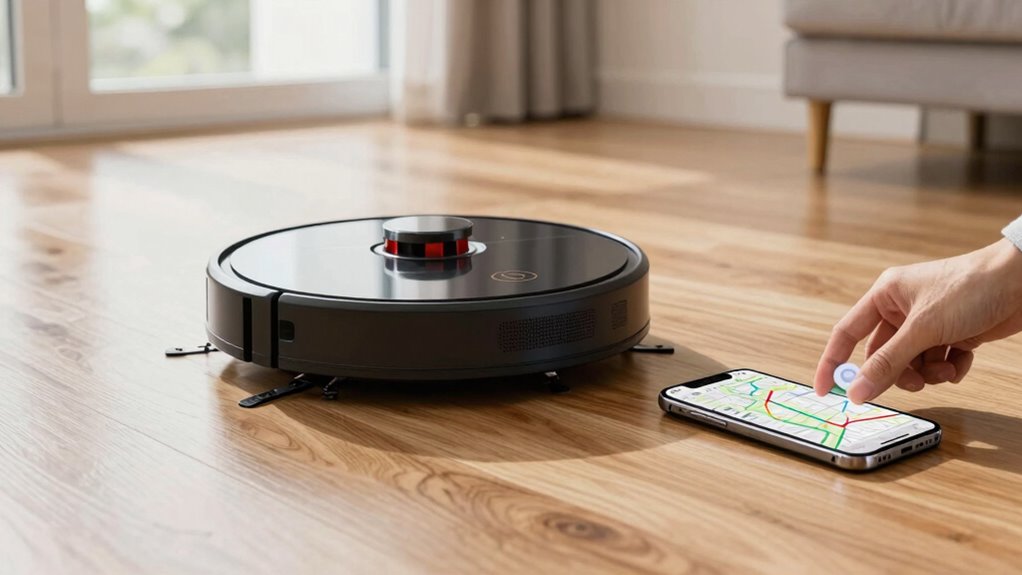
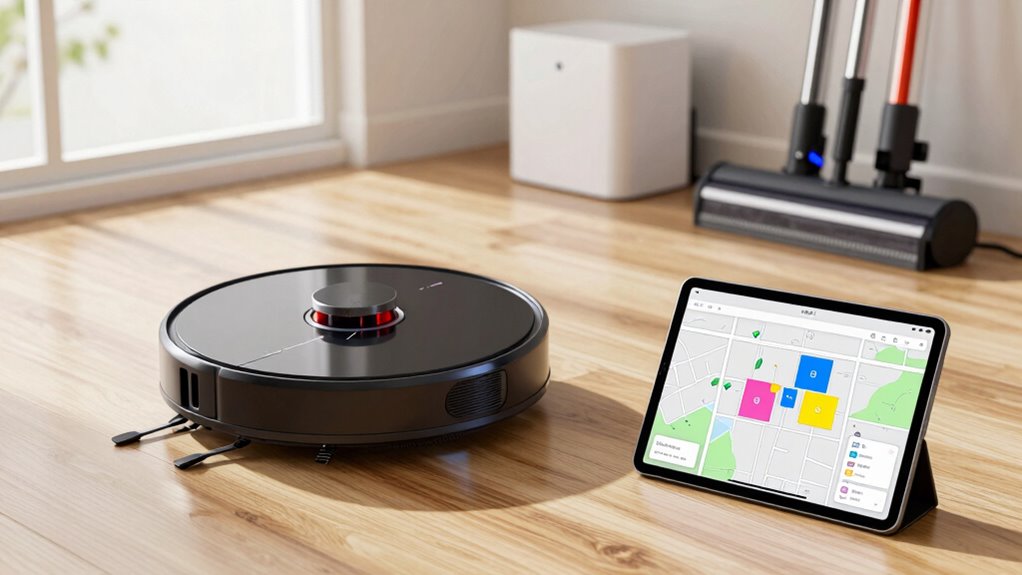
Access and Set Up Your Robot Vacuum’s Map Settings
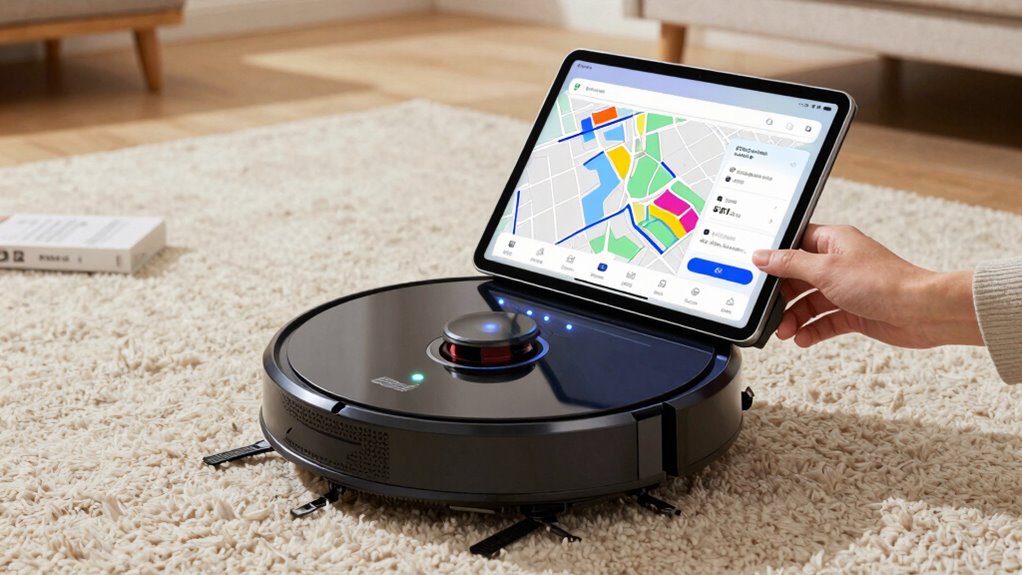
To optimize your robot vacuum’s performance, you need to access and set up its map settings correctly. Start by opening the app or interface that controls your robot. Then, focus on these key steps:
Access your robot vacuum’s map settings to enhance cleaning efficiency and coverage.
- Adjust map customization options to define specific cleaning zones or exclude areas.
- Fine-tune navigation settings to improve how your robot moves around obstacles and covers surfaces efficiently.
- Save your preferred map layout to enable quick access for future cleanings.
- Consider reviewing water-cooled mattress pad options to ensure your home environment remains comfortable during cleaning sessions.
- Additionally, understanding shopping and car tips can help you find accessories or upgrades that enhance your robot’s capabilities.
- If you have multiple robot mowers, explore multi-unit setups to coordinate cleaning across larger or complex yard areas more effectively.
- Familiarize yourself with mapping technology to better understand how your robot navigates and optimizes its cleaning path.
Find and Clear Obstacles That Trip Up Your Robot
Obstacles can easily trip up your robot vacuum and hinder its cleaning efficiency. Check for items like cords, shoes, or clutter near your docking station that might block its path. These obstacles can cause the robot to get stuck or avoid certain areas, reducing cleaning coverage. Make sure the area around the docking station is clear so your robot can dock smoothly without delays. Clearing debris and hazards also helps preserve battery life, as the robot won’t waste energy navigating around obstacles or getting stuck. Regularly inspect the floor for small objects that could trip it up. Keeping the route clear ensures your robot completes its task efficiently, runs longer, and maintains ideal battery health, making your cleaning faster and more effective. Additionally, proper floor maintenance can prevent hidden hazards from affecting your robot’s performance. Being mindful of environmental clutter helps maintain optimal operation and reduces the chances of malfunctions. Ensuring a tidy environment also minimizes the risk of encountering unexpected silly tantrums or pet antics that could interfere with the robot’s operation. Incorporating routine inspections can further help identify potential issues before they disrupt your robot’s cleaning schedule. Addressing floor surface variations can also improve navigation and cleaning outcomes.
Adjust Virtual Boundaries to Guide Cleaning Paths
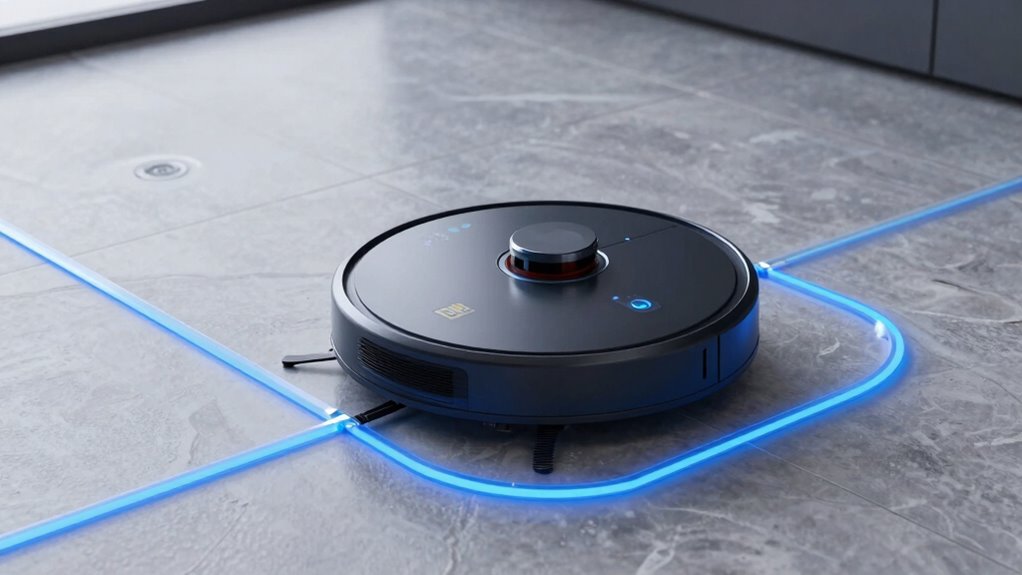
Adjusting virtual boundaries allows you to control your robot vacuum’s cleaning areas precisely. By setting up virtual boundaries, you prevent your robot from entering off-limits zones or sensitive spots. Use boundary adjustment techniques to fine-tune these virtual barriers. Incorporating foam rolling into your routine can also enhance your recovery and HRV, leading to better overall performance. Here are some tips: 1. Access your app’s virtual boundary setup feature to draw or erase zones quickly. 2. Use boundary adjustment techniques to expand or restrict cleaning areas without physically moving furniture. 3. Regularly update boundaries as your home layout changes to ensure maximum coverage. Additionally, understanding performance parts like flywheels and engine upgrades can help optimize your robot’s efficiency and power. Being aware of cabling solutions can also prevent common issues like loose connections or failures that disrupt cleaning routines. Recognizing virtual boundary settings can help you troubleshoot and refine your robot’s navigation more effectively. This simple step helps optimize your robot’s cleaning path, reduces unnecessary reruns, and saves time. With effective virtual boundary setup, you guide your robot smartly, making cleaning faster and more efficient.
Tweak Your Floor Plan for Better Coverage
To improve your robot’s cleaning efficiency, focus on optimizing its path planning and reducing wasted time. Adjust your floor plan to steer clear of obstructed areas that slow down coverage. Small tweaks can make a big difference in ensuring every inch gets cleaned thoroughly. Incorporating work-life harmony principles can help maintain a balanced approach to managing your smart home devices. Paying attention to spatial organization can further enhance your robot’s navigation by creating clear pathways and minimizing clutter.
Optimal Path Planning
Have you ever considered how your floor plan can influence your robot vacuum’s efficiency? Optimal path planning is key. By fine-tuning your robot’s mapping algorithms and guaranteeing proper sensor calibration, you improve its ability to navigate. To maximize coverage, focus on these steps:
- Use accurate mapping algorithms to create detailed floor plans, reducing missed spots.
- Regularly calibrate sensors to ensure reliable obstacle detection and navigation.
- Rearrange furniture or obstacles to promote smoother, more predictable routes.
- Incorporate Free Floating technology to allow your robot to adapt better to uneven surfaces and obstacles.
These tweaks help your robot adapt to your specific layout, reducing time spent on unnecessary loops. A well-calibrated sensor system combined with smart path planning allows your robot to clean faster and more thoroughly, making every minute count.
Avoid Obstructed Areas
Obstructed areas can considerably hinder your robot vacuum’s coverage, causing it to miss spots or waste time maneuvering around obstacles. To improve cleaning efficiency, identify cluttered spaces and remove unnecessary items from the floor. Clear pathways by relocating furniture or shifting objects away from high-traffic zones. This can be achieved by adjusting your home design and architecture details, such as door swings and stair placements, to create more open spaces. Minimizing obstructed areas that force your robot to slow down or avoid certain spots entirely is essential. Pay attention to small objects like Indonesian decor masks that can trap or block the vacuum’s sensors. Reducing cluttered spaces not only accelerates cleaning times but also ensures more thorough coverage. A tidy floor plan allows your robot to navigate smoothly, reducing missed spots and making your cleaning routine faster and more effective.
Re-Map Your Robot Vacuum to Improve Navigation
To improve your robot vacuum’s navigation, start by resetting and re-mapping its layout. Clear any obstructions that could confuse the sensors, and then adjust the navigation zones for better coverage. These quick steps guarantee your vacuum navigates efficiently and cleans thoroughly. Additionally, understanding time-related symbols can help you better interpret the vacuum’s operation patterns and optimize its cleaning schedule. Exploring regional flavors and pairings can also inspire you to customize your cleaning routines with specific cleaning schedules tailored to your household’s needs.
Reset and Re-Map
Sometimes, your robot vacuum’s navigation can go off-course or become inefficient, making it necessary to reset and re-map its surroundings. Resetting helps improve mapping accuracy and obstacle detection, guaranteeing the robot understands your space better. To do this effectively:
- Perform a full reset of the device through the app or button, clearing old maps.
- Place the robot in an open area to allow it to scan and create a new map.
- Run a thorough cleaning cycle to give the robot ample data for precise navigation.
This process helps your vacuum adapt to changes, such as furniture rearrangements or new obstacles, ultimately boosting efficiency and cleaning speed. Re-mapping ensures your robot maintains ideal navigation, saving you time and frustration.
Clear Obstructions
Clear pathways are essential for your robot vacuum to navigate efficiently. To improve map accuracy and obstacle detection, remove clutter and obstructions from your floors. Items like shoes, cords, and small objects can confuse your robot and cause it to miss spots or bump into things. By clearing these, you help your vacuum create a more precise map of your space. This not only speeds up cleaning but also enhances obstacle detection, reducing the chances of accidental crashes or missed areas. Regularly check for new obstructions and keep the floor tidy. A clear, obstacle-free environment allows your robot to plan the most efficient route and clean more thoroughly, making your cleaning routine quicker and more effective.
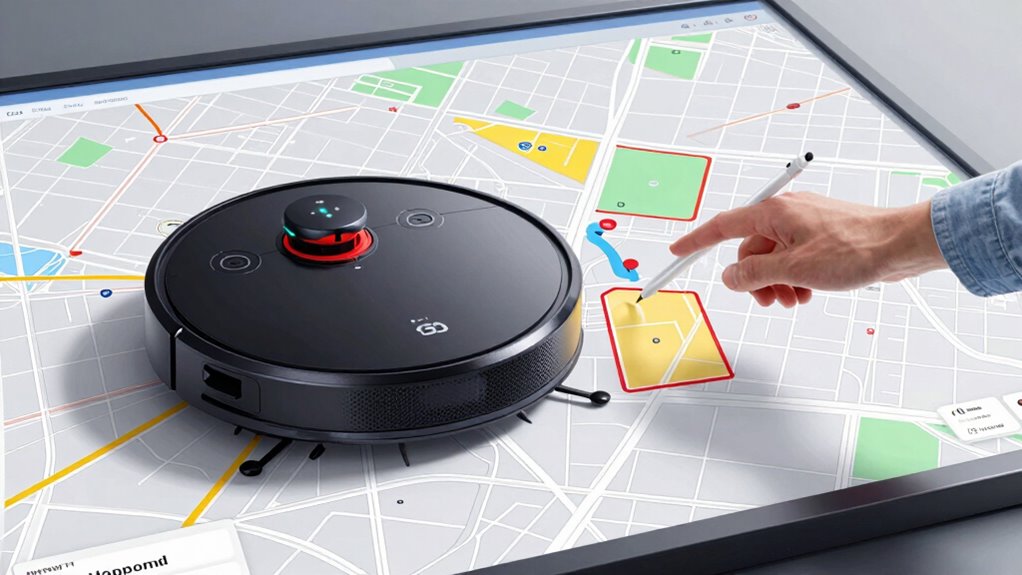
Optimize Navigation Zones
Re-mapping your robot vacuum’s navigation zones allows you to tailor its cleaning path for maximum efficiency. By customizing the map, you can define specific areas to focus on or avoid, optimizing the cleaning process. Adjusting navigation zones ensures your robot spends less time in cluttered or hard-to-reach spots, speeding up chores. To improve map customization:
- Identify high-traffic zones that need frequent cleaning.
- Block off delicate or inaccessible areas.
- Prioritize zones for deeper cleaning based on your home’s layout.
These adjustments help your robot navigate smarter, reducing missed spots and unnecessary overlaps. Properly setting navigation zones makes the cleaning routine faster and more effective, giving you a cleaner home in less time. Re-mapping is a quick step that considerably boosts your robot’s performance.
Run a Test Cleaning to Spot and Fix Navigation Gaps

Ever wonder if your navigation system is missing key paths or leading you astray? Running a test cleaning helps you identify gaps in your robot’s map accuracy and obstacle detection. Start the cleaning process and observe how your robot navigates your space. Pay close attention to areas where it hesitates, misses spots, or gets stuck. These signs reveal navigation gaps or obstacles the system isn’t recognizing properly. Use this opportunity to note any blind spots or misaligned zones. If your robot struggles to recognize certain obstacles or navigates inefficiently, adjust the map or add virtual barriers as needed. Running these quick test cleanings allows you to fine-tune your navigation system, ensuring smoother, faster cleanings in future sessions.
Update Your Map Regularly for Long-Term Efficiency
Regularly updating your map guarantees it stays accurate as layouts change. You should re-map obstructed areas and adjust for new obstacles to maintain efficiency. Scheduling consistent updates keeps your navigation reliable over the long term.
Recognize Changing Layouts
Have you noticed your workspace or route changing over time? Recognizing these changes is vital for efficient cleaning. Regularly monitor your robot’s navigation to identify new obstacles or altered layouts. Use layout recognition features to detect shifts in furniture, equipment, or clutter. This helps the robot adjust its path and avoid missed spots. Here are three key steps:
- Observe if the robot struggles with familiar areas.
- Check for new obstacles that block its usual route.
- Make certain obstacle detection sensors are functioning properly.
Re-Map Obstructed Areas
To maintain your robot’s efficiency over time, updating the map to reflect new obstructions is essential. Regular obstacle identification helps your robot recognize changes in its environment, such as furniture or clutter blocking its usual path. When it detects an obstruction, your robot can update its map, ensuring future cleaning runs are more accurate. This process allows for better map customization, tailoring the layout to your current space. By re-mapping obstructed areas, you prevent your robot from wasting time or missing spots. Keep an eye out for areas where your robot hesitates or struggles—these are signs to update the map. Consistently re-mapping obstructed zones keeps your robot functioning at peak efficiency, making cleaning faster and more thorough over the long term.
Schedule Regular Updates
Scheduling frequent map updates guarantees your robot stays aligned with your changing environment. Regular updates ensure your map customization reflects recent layout changes, preventing missed spots and improving cleaning efficiency. By keeping the map current, you enable better vacuum scheduling, so your robot targets high-traffic areas at ideal times. To maximize benefits:
- Review and update your map after major renovations or furniture rearrangements.
- Re-run map scans periodically to accommodate seasonal or layout changes.
- Adjust vacuum scheduling based on updated map zones for faster, more effective cleaning.
This proactive approach minimizes missed spots, enhances navigation, and maintains long-term efficiency. Consistently updating your map ensures your robot adapts seamlessly to your evolving space, keeping it running smoothly and cleaning faster.
Use Virtual Boundaries to Keep Your Robot on Track
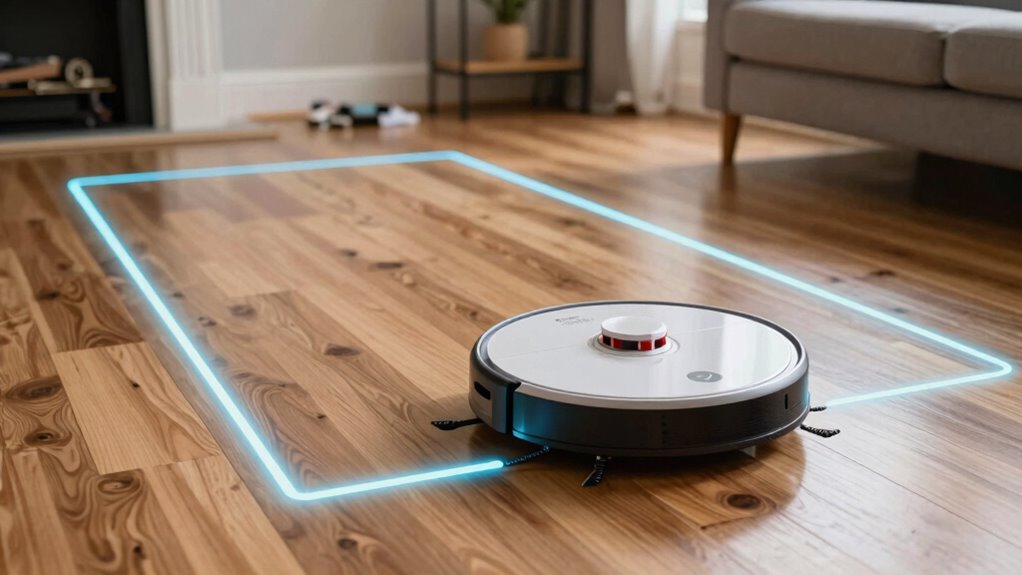
Virtual boundaries are an essential tool for keeping your robot on its designated path. By setting up boundary zones, you prevent the robot from entering areas where cleaning isn’t needed or could cause issues. The boundary setup process is straightforward: use your app to draw lines or create no-go zones around delicate furniture, cords, or clutter. These virtual zones act as invisible barriers, guiding your robot to focus on the right areas while avoiding trouble spots. Properly placing these boundaries ensures efficient cleaning and protects fragile items. Regularly review and adjust your virtual zones as your home changes. This simple step helps your robot stay on track, reduces missed spots, and keeps your cleaning routine smooth and effective.
Maintain Your Map for Continued Cleaning Success
Maintaining an accurate map of your home is key to ensuring your robot cleans effectively over time. Regularly updating your map helps preserve mapping accuracy and improves obstacle detection, preventing missed spots or repeated cleanings. To keep your map in top shape:
- Run your robot regularly to help it adapt to changes in furniture or layout.
- Use the app’s map editing tools to correct any inaccuracies or remove outdated data.
- Perform routine obstacle detection checks by moving furniture or adding virtual boundaries to guide your robot effectively.
Frequently Asked Questions
How Often Should I Update My Robot Vacuum’s Map?
You should update your robot vacuum’s map regularly, ideally every few weeks or after significant changes in your home. The mapping frequency depends on your update schedule, which varies based on how often your environment changes. If you rearrange furniture or add new obstacles, update the map promptly to guarantee efficient cleaning. Consistent map updates help your robot navigate better and clean faster, saving you time and effort.
Can Multiple Floors Be Mapped Separately?
Absolutely, you can create a symphony of clean floors with multi-floor mapping by setting up separate floorplans. Think of each level as a different movement in your home’s musical score. Your robot vacuum can learn and remember each floor’s unique layout, switching seamlessly as it moves. This way, you guarantee efficient cleaning without missing spots, making your home chore a harmonious, multi-layered dance of dirt and debris.
What Are Common Map Errors and How to Fix Them?
You’ll want to perform map correction by reviewing your robot’s map for errors like gaps, overlaps, or misplaced furniture. Error troubleshooting involves recalibrating sensors or resetting specific zones. Regularly update your map to guarantee accuracy, especially after rearranging furniture or cleaning. Use your app’s editing tools to fix inaccuracies, then rerun the mapping process if needed. These steps help your robot clean more efficiently and avoid missed spots or collisions.
How Does Map Quality Affect Cleaning Speed?
Map quality directly impacts your cleaning speed by guaranteeing accurate mapping and obstacle detection. When mapping accuracy is high, your robot navigates efficiently, covering more area without unnecessary stops or retries. Proper obstacle detection helps the robot avoid delays caused by missed or misunderstood objects. Regularly updating and fine-tuning your map ensures ideal navigation, allowing your robot to clean faster and more effectively with fewer errors.
Are There Safety Tips for Editing Virtual Boundaries?
To make certain virtual boundary safety while editing, start by clearly defining the areas you want your robot to avoid. Use boundary editing tips like zooming in for precision and double-checking your adjustments before saving. Avoid placing boundaries near stairs or sensitive zones, and always update your map in a well-lit environment. Regularly review boundaries to prevent accidental collisions, keeping both your home and your robot safe during cleaning.
Conclusion
Think of your robot’s map as its guiding star, leading it through your home’s maze. With a quick tune-up, you’re clearing the path for smoother navigation, like tidying a trail to let your robot glide effortlessly. When you keep the map updated and obstacles at bay, it’s like handing your vacuum a clear, bright road—making cleaning faster, easier, and more thorough. Soon, your home gleams, and your robot moves like it’s on a well-lit highway.