
To make your auto-emptying process much quieter, you should adjust the volume or sound settings in your vacuum’s menu, often labeled as quiet mode or volume control. Lowering this setting reduces loud noises during emptying cycles. Additionally, placing the docking station on a soft surface or using vibration dampening can help. For more tips on minimizing noise and optimizing your vacuum operation, explore further suggestions to keep your space peaceful.
Key Takeaways
- Lower the auto-emptying volume setting in the vacuum’s settings menu to reduce noise during the cycle.
- Activate quiet mode or sound reduction options if available in the device’s sound settings.
- Place the docking station on a sound-absorbing surface like a mat or rubber pad to dampen vibrations.
- Regularly clean filters, seals, and the dustbin to prevent blockages that cause loud noises.
- Ensure the docking station and vacuum are well-maintained to minimize vibrations and rattling during emptying.
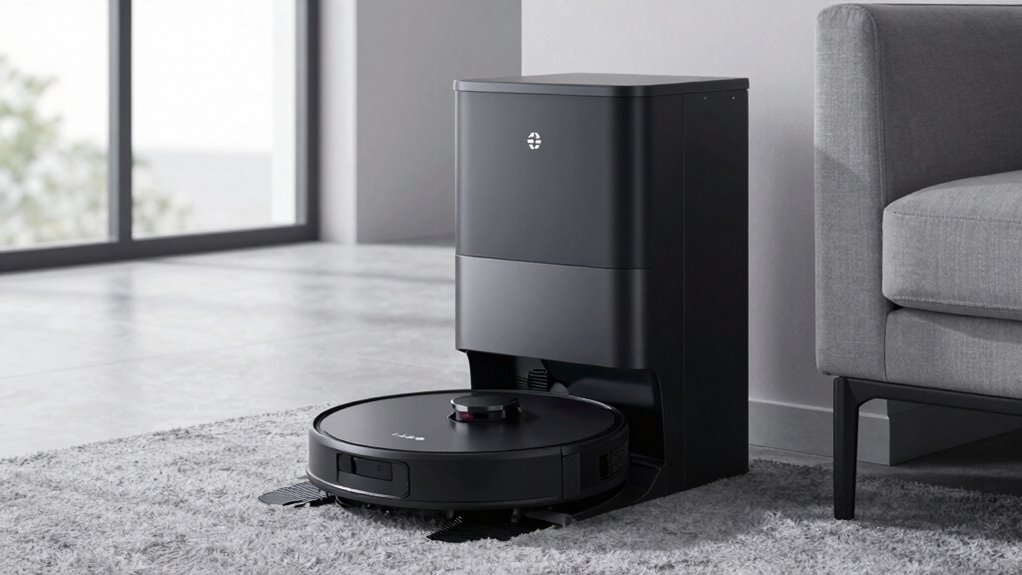
How to Make Your Auto-Emptying Robot Vacuum Quieter

If your auto-emptying robot vacuum is too loud during operation, there’s a simple setting you can adjust to reduce the noise. Regular maintenance tips, like cleaning filters and brushes, help keep the vacuum running smoothly and prevent unnecessary noise caused by debris buildup. Additionally, maintaining ideal battery life ensures the vacuum operates efficiently, which can also cut down on loud, prolonged cycles. When batteries are worn out, the motor may strain, increasing noise levels. Make sure to follow the manufacturer’s recommendations for charging and replacing batteries to keep noise levels in check. Proper maintenance not only quiets the vacuum but also extends its lifespan, improving overall performance and ensuring quieter operation over time. Proper maintenance includes checking for loose parts and ensuring the motor is lubricated, which can further reduce noise levels. Regularly inspecting the airflow around the unit helps prevent strain on the motor, contributing to quieter operation. Additionally, optimizing ventilation around the vacuum can help dissipate heat and reduce operational noise. Incorporating soundproofing techniques around the device may also help minimize noise disturbances during use. Being aware of motor health and addressing issues early can prevent excessive noise caused by worn components.
The Main Setting That Can Reduce Noise During Emptying

One of the most effective ways to reduce noise during your robot vacuum’s emptying cycle is by adjusting the auto-emptying volume setting. This simple change considerably impacts noise reduction techniques, making vacuum maintenance less disruptive. Lowering the volume minimizes loud sounds during emptying, which is especially helpful if you live in a shared space or have noise sensitivities. To do this, access your vacuum’s settings menu and locate the auto-emptying volume options. Regular vacuum maintenance, like cleaning the dustbin and filters, also prevents unnecessary noise caused by blockages or debris. Additionally, choosing a model with a quiet operation feature can further enhance your experience. Implementing noise mitigation strategies such as adjusting settings or positioning the vacuum away from living areas can significantly improve comfort. Proper vacuum placement also helps contain noise and reduces disturbance during operation. By combining volume adjustments with good maintenance habits, you’ll enjoy quieter operation and extend your vacuum’s lifespan, ensuring it performs efficiently without contributing to unwanted noise.
How to Adjust Volume and Sound Settings for Quiet Operation

Adjusting the volume and sound settings on your robot vacuum allows you to customize its noise level for quieter operation. Start by exploring the device’s sound options in the settings menu, where you can lower the volume or activate a quiet mode. Regular vacuum maintenance, like cleaning brushes and filters, also helps reduce noise by preventing strain on motors. Incorporate sound insulation techniques, such as placing the vacuum on a soft surface or using barriers, to further dampen sound. These adjustments not only make your vacuum quieter but also improve overall operation. Properly calibrating sound settings can significantly enhance your cleaning experience by minimizing disturbances. Additionally, understanding the impact of motor strain on noise levels can help you optimize performance and extend the lifespan of your vacuum. Keeping the vacuum’s components in good condition reduces unnecessary noise and ensures smoother operation. Keep in mind that a well-maintained vacuum produces less noise, so routine maintenance plays a key role in achieving a quieter environment during cleaning and auto-emptying. Using sound-dampening materials can further help in reducing noise levels during operation.
Tips to Further Minimize Noise During Auto-Emptying

To further reduce noise during auto-emptying, consider placing the vacuum’s docking station on a sound-absorbing surface, like a thick mat or rubber pad. This simple maintenance tip can markedly dampen vibrations and noise transmission, making the process quieter. Comparing noise levels before and after implementing this tip shows a noticeable difference, especially in quieter environments. You’ll find that minimizing vibrations helps reduce the overall noise comparison, making the auto-emptying process less disruptive. Additionally, regularly checking and maintaining the docking station’s components, such as seals and filters, ensures smooth operation. Keeping these parts in good condition prevents unnecessary noise caused by loose or worn elements. These proactive maintenance tips help you enjoy a quieter cleaning experience overall.
Troubleshooting Persistent Noise Issues in Your Vacuum

Even with proper placement and maintenance, you might still experience persistent noise issues during your vacuum’s auto-emptying process. One common cause is a declining battery lifespan, which can cause the vacuum to operate irregularly and produce more noise. Check if your vacuum’s battery needs replacement, as an aging battery can strain the motor and create unnecessary sounds. Additionally, a full or improperly sealed dust compartment can cause loud noises or rattling. Make sure the dust compartment is emptied regularly and securely closed. Inspect for any debris or obstructions that might be causing vibrations. Cleaning the dust compartment and replacing the battery when needed can considerably reduce persistent noise issues, ensuring quieter, smoother auto-emptying performance. Regularly monitoring your vacuum’s battery health can help prevent unexpected noise problems and maintain optimal functionality. Proper filter maintenance can also improve overall operation and reduce noise levels, contributing to a more quiet operation.
Frequently Asked Questions
Does the Noise Reduction Setting Affect Vacuum Cleaning Performance?
The noise level customization generally doesn’t impact your vacuum’s cleaning performance. When you adjust the noise reduction setting, it mainly reduces sound without affecting suction power or cleaning efficiency. You can enjoy quieter operation while maintaining the same high performance. However, some models might see a slight performance impact if they limit motor speed to reduce noise. Overall, you can customize noise levels without sacrificing cleaning quality.
Can I Customize Noise Levels for Different Environments?
Yes, you can customize noise levels for different environments. Think of it like tuning a guitar to match the mood — with noise customization, you adjust your vacuum’s sound to suit your setting. Use environment adjustment features to lower noise during quiet times or when guests are around. This way, you maintain a peaceful atmosphere without sacrificing cleaning power, giving you control over your home’s soundscape at all times.
How Often Should I Perform Maintenance to Keep Noise Low?
You should perform dust bin maintenance and replace filters regularly to keep noise levels low. Check your vacuum’s dust bin weekly and empty it when full, and follow the filter replacement schedule provided in the user manual—usually every 3 to 6 months. Regular maintenance prevents motor strain and reduces noise, ensuring your device operates quietly and efficiently. Staying consistent with these tasks keeps your vacuum running smoothly.
Are There Specific Models With Inherently Quieter Auto-Emptying Features?
Yes, some models are designed for better noise reduction and are inherently quieter during auto-emptying. Look for models with advanced sound insulation and compatibility with noise-reducing accessories. Brands like iRobot and Roborock often offer models with optimized auto-emptying features that minimize noise. Check the specifications to guarantee compatibility with your vacuum, and select those that prioritize quieter operation for a more peaceful cleaning experience.
Is There a Recommended Time to Activate Quieter Settings for Night Use?
Think of noise level adjustments as your secret lullaby for a peaceful night. You should activate sleep mode activation around your bedtime, usually after the last cleaning cycle. This setting minimizes noise and prevents disturbances, making your auto-emptying process much quieter. By doing so, you create a calm environment, letting your robot vacuum work quietly while you enjoy uninterrupted sleep. It’s the simple switch that turns chaos into calm.
Conclusion
By tweaking the right settings and following these tips, you can make your auto-emptying robot vacuum run much quieter. Adjusting volume controls and minimizing noise during emptying isn’t just about comfort; it’s backed by the idea that proper setup can markedly reduce disturbances. So, go ahead—experiment a little. With a bit of effort, you’ll enjoy a quieter, more peaceful cleaning experience, proving that small changes can make a big difference in your home’s noise level.