To clean your robot vacuum’s sensors, turn off and unplug the device first. Gently wipe the sensors with a soft, lint-free cloth, avoiding spraying liquids directly. Use a mild cleaner or a soft brush for stubborn grime, and consider compressed air or a lightly dampened cloth for laser or optical sensors. Regular cleaning and calibration help keep obstacle detection sharp. If you want step-by-step instructions, there’s more to discover to guarantee peak performance.
Key Takeaways
- Turn off and unplug the robot vacuum before starting sensor cleaning to ensure safety.
- Identify sensors as small, dark, or transparent panels on the device’s front, sides, or bottom.
- Gently wipe sensors with a soft, lint-free cloth dampened with water or mild cleaner; avoid harsh chemicals.
- Use a soft brush or compressed air for laser or optical sensors to remove dust and debris effectively.
- Calibrate sensors via the app or control panel following manufacturer instructions for optimal obstacle detection.

Keeping your robot vacuum functioning properly often hinges on clean sensors, which can get dirty over time and affect its performance. Dirty sensors can lead to poor obstacle detection, causing your vacuum to bump into furniture or miss spots altogether. To keep everything running smoothly, you need to regularly clean and calibrate those sensors. Proper sensor calibration ensures the vacuum’s obstacle detection remains accurate, preventing mishaps and maximizing cleaning efficiency.
Regularly clean and calibrate your robot vacuum sensors to maintain optimal obstacle detection and cleaning performance.
Begin by turning off your robot vacuum and unplugging it if possible. This step prevents accidental activation while you’re working on it. Locate the sensors—most models have sensors on the front, sides, or bottom. These are usually small, dark, or transparent panels. Gently wipe them with a soft, lint-free cloth to remove dust, dirt, or smudges. For stubborn grime, lightly dampen the cloth with water or a mild cleaning solution, but avoid using harsh chemicals that could damage the sensors. Never spray cleaning liquids directly onto the sensors; always apply them to the cloth first.
If your vacuum features laser or optical sensors, use a soft brush or compressed air to clear any debris from small crevices or vents. Be cautious around delicate parts to avoid dislodging or damaging them. Once you’ve cleaned the sensors, it’s time for sensor calibration. Many robot vacuums offer a calibration feature accessible via the app or control panel. Follow your manufacturer’s instructions to recalibrate the obstacle detection system, which often involves placing the vacuum in a specific position or running a calibration routine. This process helps the sensors recognize obstacles accurately, improving navigation and reducing collisions.
If your vacuum doesn’t have a calibration feature, you can simulate calibration by manually testing obstacle detection. Place small objects in the vacuum’s path and observe if it detects and avoids them properly. If it doesn’t, repeat the cleaning process or consider resetting the sensors through a full reboot, often done by turning the device off and on again. Regularly maintaining these sensors and calibrating them ensures your vacuum’s obstacle detection stays sharp, which prevents damage to furniture and improves cleaning coverage.
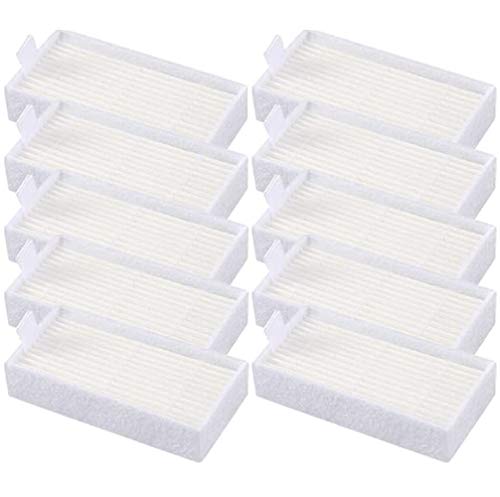
10pcs HEPA Filters Replacement for ILIFE V3s V3s pro V5 V5s V5s Pro V5s Pro 2 V5s Plus Noisz S5 Robotic Vacuum Cleaner ILIFE V3s pro Filters ILIFE Robot Vacuum Filter
- Compatible with Various ILIFE Models: Fits V3, V3s, V5, V5s, Pro versions
- High-Quality Filter Material: Made of efficient, durable filter material
- 100% Compatible with Original Filters: Ensures perfect fit and performance
As an affiliate, we earn on qualifying purchases.
Frequently Asked Questions
How Often Should I Clean My Robot Vacuum Sensors?
You should clean your robot vacuum sensors regularly to maintain ideal performance. Dust accumulation can interfere with sensor calibration, causing the vacuum to misjudge obstacles or navigation paths. Aim to clean the sensors at least once a month, or more often if you notice reduced efficiency. Keeping sensors clear helps your robot navigate smoothly, ensuring thorough cleaning and prolonging its lifespan. Regular maintenance prevents issues caused by dust buildup and calibration errors.
Can I Use Alcohol to Clean the Sensors?
Sure, go ahead and grab alcohol to clean your sensors—who wouldn’t want to risk sensor damage just to feel like a rebel? In reality, using alcohol too often or in high concentrations can harm the sensors, despite its cleaning power. Keep the cleaning frequency modest, and use a soft, damp cloth instead. This way, you protect your vacuum’s sensors and guarantee ideal performance without risking damage.
What Tools Are Best for Sensor Cleaning?
When cleaning sensors, you want tools that match the sensor types, like microfiber cloths for delicate surfaces and soft brushes for textured areas. Use minimal cleaning frequency—just when you notice performance drops. You shouldn’t need harsh chemicals; a gentle wipe with a slightly damp cloth works best. Avoid abrasive tools to prevent damage. Regular, careful cleaning helps your robot vacuum maintain ideal sensor function and navigation.
Will Cleaning Sensors Improve Vacuum Navigation?
Cleaning your sensors definitely improves your robot vacuum’s navigation accuracy. When you keep sensors free of dust and debris, it helps with sensor calibration, ensuring the vacuum can better detect obstacles and map your space accurately. Regular cleaning prevents errors in navigation, so your vacuum moves more efficiently and avoids getting stuck. As a result, your cleaning sessions become faster and more effective, giving you a cleaner home with less hassle.
Are There Any Risks in Cleaning the Sensors Myself?
Cleaning your robot vacuum sensors can improve navigation, but risks exist if you’re not careful. You might accidentally cause sensor damage or scratch delicate parts. Also, doing it yourself could void your warranty if the manufacturer specifies professional cleaning. To avoid these issues, handle sensors gently, use proper tools, and check your warranty terms before proceeding. This way, you keep your vacuum functioning well without risking damage or losing coverage.

Filter Replacement for iRobot Roomba e, i and j Series i7 i7+/plus i3 i3+ E5 E6 E7 i4 i6 i6+ i8 i8+ Robot Vacuum Cleaners parts, 9 Pack High Efficiency 4639161 Filters
- Compatible with Roomba E, I, J Series: Fits various Roomba models including i7, i3, i6, i8, and J series
- High Efficiency Filtration: Filters 99.9% of dust, pet hair, and particles
- Effective Particle Capture: Captures particles as small as 0.3 microns
As an affiliate, we earn on qualifying purchases.
Conclusion
Now that you’ve cleaned your robot vacuum’s sensors, you’re all set for better navigation and cleaning performance. It’s a simple task, yet it makes a big difference—like sharpening a dull blade or tuning a guitar. Skipping this step might save a few minutes, but it could lead to missed spots or constant obstructions. So, take the time now; your vacuum’s efficiency depends on it, just as your home depends on a well-maintained tool.

roborock Q7 M5+ Robot Vacuum and Mop, Up to 7-9 Weeks Self-Empty, 10000Pa
- Long-lasting Self-Emptying: Up to 7-9 weeks with 2.7L dust bag
- Powerful Suction: 10000Pa for deep cleaning
- Anti-Tangle System: Dual design resists pet hair wrap
As an affiliate, we earn on qualifying purchases.

ROPVACNIC Robot Vacuum and Mop Combo 5200Pa Suction Robotic Cleaner
- 2-in-1 Vacuum and Mop: Integrated vacuum and mopping technology
- Personalized Water Adjustment: Four-stage water control system
- Smart Control & Voice Commands: App and voice-controlled cleaning modes
As an affiliate, we earn on qualifying purchases.