If your robot keeps throwing error codes, start by checking its power supply and making sure all hardware connections are secure and undamaged. Reset the robot to clear temporary glitches, then inspect sensors, wheels, and moving parts for damage or obstructions. Updating the firmware or software can fix known bugs. If the problem persists, it’s best to contact support or seek professional help, as further steps can help you troubleshoot more effectively.
Key Takeaways
- Check and ensure the robot’s power supply and hardware connections are secure and undamaged.
- Refer to the manufacturer’s manual and diagnostic tools to interpret error codes accurately.
- Perform a basic reset by powering off and on to clear temporary glitches.
- Inspect sensors, wheels, and moving parts for obstructions or damage, cleaning or replacing as needed.
- Seek professional assistance if error codes persist or if physical damage or unusual behavior occurs.
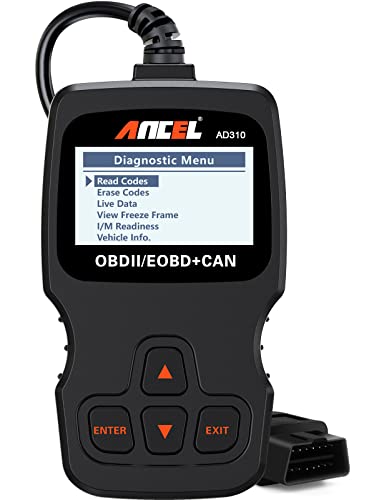
ANCEL AD310 Classic Enhanced Universal OBD II Scanner Car Engine Fault Code Reader CAN Diagnostic Scan Tool, Read and Clear Error Codes for 1996 or Newer OBD2 Protocol Vehicle (Black)
CEL Doctor: The ANCEL AD310 is one of the best-selling OBD II scanners on the market and is…
As an affiliate, we earn on qualifying purchases.
As an affiliate, we earn on qualifying purchases.
What Do Robot Error Codes Mean and Why Do They Appear?

Robot error codes serve as the machine’s way of communicating that something isn’t functioning correctly. When you see an error code, it indicates a specific issue that needs attention. These codes are essential for error code troubleshooting because they quickly pinpoint where the problem lies, saving you time. Understanding what each code means helps you assess whether the problem is minor or requires professional repair. Robot diagnostics tools interpret these codes, providing detailed information about the malfunction. This process simplifies troubleshooting and guides your next steps. Keep in mind that error codes aren’t random; they’re designed to alert you to specific faults, such as sensor failures, mechanical jams, or software glitches. Recognizing what these codes signify is your first step toward effective maintenance and getting your robot back in action. Additionally, knowing the contrast ratio of your projector can help you optimize your home cinema setup for the best viewing experience. Recognizing the error code meanings can also help you determine whether a simple reset or a professional repair is needed. Properly interpreting these codes often involves understanding the diagnostic procedures, which can vary depending on the robot model. For example, some robots may have self-diagnostic features that provide more detailed insights into the issue. Being familiar with common error code patterns can further streamline the troubleshooting process.

Ozobot Evo Classroom Kit (12 Bots): Interactive Coding Robots for Students, STEAM Learning Tools for Schools, Includes Charging Station, Storage Case, Markers, and Comprehensive Coding Curriculum
ROBUST CLASSROOM CODING SOLUTION: The Evo Classroom Kit is a comprehensive solution for grades K-12 STEAM (Science, Technology,…
As an affiliate, we earn on qualifying purchases.
As an affiliate, we earn on qualifying purchases.
Check Your Robot’s Power and Hardware Connections

Start by inspecting the power supply to guarantee your robot is properly connected and receiving power. Next, check all hardware connections to confirm they’re secure and free of damage. These simple steps can often resolve many error codes related to power and hardware issues. Additionally, ensuring your robot is operating in an environment with proper air quality can help prevent hardware malfunctions. Maintaining good environmental conditions, such as temperature and humidity, is essential for optimal robot performance, and paying attention to electrical safety can also prevent damage or injury. Incorporating system maintenance routines can further improve reliability and reduce the likelihood of errors. Regularly monitoring system diagnostics can help catch potential issues early before they lead to errors.
Power Supply Inspection
Before troubleshooting other issues, it’s essential to verify that your robot’s power supply and hardware connections are secure. Start by inspecting the battery, ensuring it’s properly seated and has no corrosion. Proper battery maintenance includes cleaning procedures to remove dirt or debris that could affect performance. Check for loose or damaged cables and connectors, these can cause power interruptions. Use the table below to guide your inspection:
| Step | Action | Tips |
|---|---|---|
| 1 | Inspect battery terminals | Clean with a soft cloth |
| 2 | Check power cables | Secure connections |
| 3 | Verify hardware connections | Look for damage or wear |
A thorough check saves time and prevents future error codes, especially since power supply issues are common causes of robotic malfunctions. Ensuring all hardware components are functioning correctly can help in maintaining optimal robot performance. Additionally, regularly inspecting electrical connections can prevent unexpected failures. Regular maintenance of electrical components enhances overall reliability. Keeping connection integrity intact is crucial for avoiding downtime and ensuring consistent operation.
Secure Hardware Connections
Ensuring your robot’s hardware connections are secure is vital for reliable operation. Loose or faulty connections can cause error codes, especially if wireless connectivity drops or signals become unstable. Check all cables and connectors, making sure they’re firmly attached to their ports. This prevents potential connection issues that could disrupt your robot’s performance. A stable connection ensures smooth communication through the user interface, preventing misreads or errors. Also, verify the integrity of wireless connections—restart your router or reconnect to Wi-Fi if needed. Properly secured hardware minimizes disruptions, keeps error codes at bay, and guarantees your robot operates seamlessly. Taking these steps helps maintain consistent performance and reduces troubleshooting time down the line. Regularly inspecting connection stability can prevent many common issues before they occur. Additionally, paying attention to hardware durability ensures long-term reliability of your robot’s connections. Remember, ensuring hardware robustness is key to maintaining optimal operation over time.

K&F CONCEPT 24mm Full Frame Sensor Cleaning Swab*6 + 20ml Sensor Cleaner, DSLR SLR Digital Camera CMOS and CCD Sensor Cleaning Swab Kits for Nikon Sony Canon Camera Clean
【6 Pieces of 24mm Sensor Cleaning Swabs】 Tailored according to the size of the Full frame frame sensor;Smudge-and…
As an affiliate, we earn on qualifying purchases.
As an affiliate, we earn on qualifying purchases.
How to Identify Error Codes and Find Their Meaning

To identify error codes, start by recognizing common ones your robot may display. Next, consult the manufacturer’s manual to understand what each code indicates. Additionally, diagnostic tools and software can help you quickly pinpoint issues and confirm the error’s cause. Understanding error codes can help you troubleshoot more effectively and prevent unnecessary repairs. Using performance metrics and analytical data may also help identify patterns that point to specific problems, saving time and effort. Regularly inspecting wiring safety and adhering to best practices can reduce the risk of wiring-related faults. Herbal teas like chamomile and ginger may also help reduce stress, which can sometimes be mistaken for technical problems.
Recognize Common Error Codes
Recognizing common error codes is essential for quickly diagnosing robot issues. By understanding error code interpretation, you can identify the problem faster and minimize downtime. Start by noting the specific numbers or letters displayed on your robot’s screen or indicator panel. These codes often follow standard formats, making it easier to look up their meanings. Keep a record of the error codes as they occur to track patterns or recurring issues. Familiarize yourself with basic troubleshooting guidelines related to these codes, such as checking connections, sensors, or power supplies associated with the error. Recognizing these codes early helps streamline the diagnostic process, saving you time and effort. Understanding error code interpretation is crucial for efficient problem-solving. Additionally, being aware of your dog’s behavior and health signals can aid in identifying underlying issues that might be causing operational errors, just as understanding safety tips for portable oil radiators can help prevent hazards during maintenance or troubleshooting. Incorporating halal cultural practices into your troubleshooting routine can also promote a respectful and inclusive environment during repair procedures.
Consult Manufacturer Manuals
Consulting the manufacturer’s manual is one of the most reliable ways to identify and understand error codes. Your manual provides detailed information about each code, including its meaning and recommended actions. It often includes troubleshooting checklists that help you systematically diagnose issues. Additionally, manuals outline maintenance schedules, which can prevent errors caused by neglect or wear. By referencing these resources, you can quickly pinpoint the problem and determine if you need to perform routine maintenance or more specific repairs. Always keep your manual accessible for quick reference, especially when troubleshooting. This approach guarantees you follow manufacturer guidelines, reducing downtime and avoiding unnecessary repairs. Properly understanding error codes through the manual helps you maintain ideal robot performance efficiently.
Use Diagnostic Tools
Using diagnostic tools is one of the quickest ways to identify error codes and understand what they mean. These tools help you access the robot’s system logs, revealing specific error codes that indicate where the problem lies. Once you have the code, error code interpretation becomes straightforward, guiding you toward the root cause. Many diagnostic tools also assist with robot calibration, ensuring sensors and actuators function correctly. Proper calibration can resolve errors caused by misaligned parts or inaccurate readings. By regularly using diagnostic tools, you can quickly pinpoint issues, saving time and reducing downtime. Always follow the manufacturer’s instructions for your diagnostic equipment, and document the error codes you encounter to track recurring problems and improve troubleshooting efficiency.
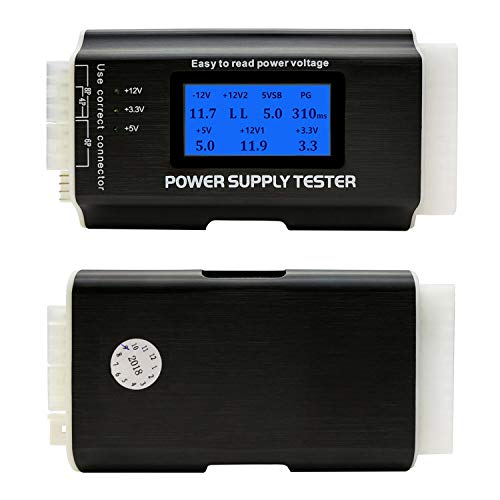
Computer PC Power Supply Tester, ATX/ITX/IDE/HDD/SATA/BYI Connectors Power Supply Tester, 1.8'' LCD Screen (Aluminum Alloy Enclosure)
[8-in-1 ATX Power Supply Tester] — Support test 20-pin ATX / 24-pin ATX / HDD (IDE) / Floppy…
As an affiliate, we earn on qualifying purchases.
As an affiliate, we earn on qualifying purchases.
Reset Your Robot to Clear Temporary Glitches

When your robot starts acting unpredictably, performing a simple reset can often clear temporary glitches and restore normal function. The first step is to power cycle your robot by turning it off, waiting a few seconds, then turning it back on. This process resets the system and can resolve minor software hiccups that cause error codes. Power cycling is a quick, effective way to clear temporary glitches without needing to open the device or check components. If your robot continues to display error messages after the reset, repeat the power cycle a couple of times. Often, this simple step resolves issues caused by temporary glitches, helping your robot operate smoothly again. Remember, a reset is a basic troubleshooting step before exploring more in-depth repairs.
Inspect Sensors, Wheels, and Moving Parts for Damage or Obstructions
To keep your robot running smoothly, it’s vital to check its sensors, wheels, and moving parts regularly for damage or obstructions. Start by inspecting sensors for dirt, debris, or misalignment that can affect sensor calibration. Clean sensors gently to guarantee accurate readings. Look over the wheels and moving components for cracks, wear, or debris that could hinder movement. Remove any obstructions that might block sensors or wheels, such as tangled hair or loose objects. Confirm that all moving parts move freely without resistance. Proper obstruction removal prevents errors caused by physical blockages. If you notice damaged or worn parts, replace or repair them to maintain peak performance. Regular inspection and cleaning reduce the chances of error codes triggered by mechanical or sensor issues.
Update Firmware or Software to Fix Known Issues

Updating your robot’s firmware or software is essential for fixing known issues and ensuring ideal performance. Firmware updates and software patches address bugs, improve stability, and add new features that can resolve error codes. Check the manufacturer’s website or app for the latest updates, and follow instructions carefully to install them correctly. Regular updates help prevent glitches that might cause errors or disrupt operation. Keep your robot’s firmware current by downloading and installing updates promptly. Sometimes, outdated software can cause compatibility issues or missing fixes for known problems. Remember, updating firmware and applying software patches is a proactive step that keeps your robot running smoothly and minimizes the chances of recurring error codes.
When to Contact Support or Seek Professional Repair

Sometimes, despite troubleshooting tips and software updates, your robot may still show error codes or act unpredictably. If you’ve tried basic fixes and the issue persists, it’s time to contemplate professional help. Contact support or seek robot repair services when:
- Error codes keep recurring despite multiple troubleshooting attempts.
- You notice unusual noises, overheating, or physical damage.
- The robot isn’t responding to commands or calibration attempts fail.
- DIY troubleshooting doesn’t resolve persistent issues or if you’re unsure about repairs.
Knowing when to escalate helps prevent further damage and ensures safety. Don’t risk voiding warranties or worsening problems—professional repair can save you time and money by addressing complex hardware or software issues effectively.
Frequently Asked Questions
Can Error Codes Cause Permanent Damage to My Robot?
Error codes themselves usually don’t cause permanent damage to your robot, but ignoring them can lead to serious issues. Many error code myths suggest that all codes mean immediate harm, which isn’t true. By addressing error codes promptly, you can prevent damage and ensure proper damage prevention. Stay attentive to error messages, troubleshoot them correctly, and avoid neglecting warnings to keep your robot functioning smoothly and prolong its lifespan.
How Often Should I Perform Maintenance Checks?
You should perform maintenance checks regularly, ideally following your robot’s recommended maintenance schedule. Inspection frequency depends on how often you use it and the environment, but generally, check for signs of wear and tear every month. Consistent maintenance helps catch issues early, preventing errors and potential damage. Staying proactive ensures your robot remains in excellent condition, reducing downtime and extending its lifespan.
Are There Common Error Codes Specific to My Robot Model?
Every model has its quirks, so it’s wise to check your robot’s manual for common error codes specific to your model. These often relate to model-specific issues like sensor malfunctions or motor glitches. Keep your firmware updated—”an ounce of prevention is worth a pound of cure.” Firmware updates fix bugs, improve performance, and reduce error codes, helping your robot run smoothly and avoiding unnecessary troubleshooting.
What Precautions Should I Take Before Resetting My Robot?
Before resetting your robot, verify you prioritize battery safety by disconnecting it from power sources. Check for any firmware updates to prevent potential issues post-reset. Make sure the robot is on a stable, dry surface and remove any accessories or obstructions. Avoid resetting if the battery is overheating or damaged. Taking these precautions helps protect your robot’s components and ensures a smoother reset process.
Is Professional Repair Necessary for All Error Codes?
Is professional repair always necessary when your robot shows error codes? Not necessarily. Sometimes, software updates fix the issue, saving you time and money. However, if error codes persist after updating, hardware replacements might be needed, and professional repair becomes essential. Don’t ignore ongoing problems—you risk further damage. Regular maintenance and timely diagnostics help avoid costly repairs, ensuring your robot stays efficient and reliable.
Conclusion
If your robot keeps throwing error codes despite your efforts, don’t give up just yet. Sometimes, the fix lies just beneath the surface, waiting to be uncovered. But what if the problem runs deeper than you think? Stay vigilant, follow these steps carefully, and consider the unexpected. The next move could reveal a hidden issue—one that might change everything. Are you ready to uncover what’s really going on?